Ice dams form when heat escapes through your roof, melts snow, and that water refreezes at the cold eaves. Left unchecked, they force water under your shingles and into your home. The good news is that most ice dam problems trace back to a few fixable issues inside your attic.
This guide covers why ice dams form, how to stop them before winter hits, and what to do safely if one is already on your roof.
Key Takeaways
- Heat loss is the root cause — Ice dams form because warm air escapes through an under-insulated or poorly ventilated attic, not because of cold weather alone.
- Attic insulation is your first line of defense — Adding insulation to R-38 to R-60 (depending on your climate zone) keeps the roof deck cold and prevents uneven snow melt.
- Ventilation works with insulation — Intake vents at the soffits and exhaust vents at the ridge pull cold air through the attic, balancing the temperature across the roof surface.
- Heat cables are a backup, not a fix — Self-regulating heat cables prevent ice buildup in gutters and valleys but do not address the underlying heat loss problem.
- Never use a pick or axe for removal — Mechanical chipping damages shingles and voids roofing warranties. Use calcium chloride or hire a professional with a steam system.
- Water damage is the real cost — A single ice dam season can cause ceiling stains, rotted roof decking, and mold growth if water infiltration goes undetected.
What Causes Ice Dams to Form on a Roof?
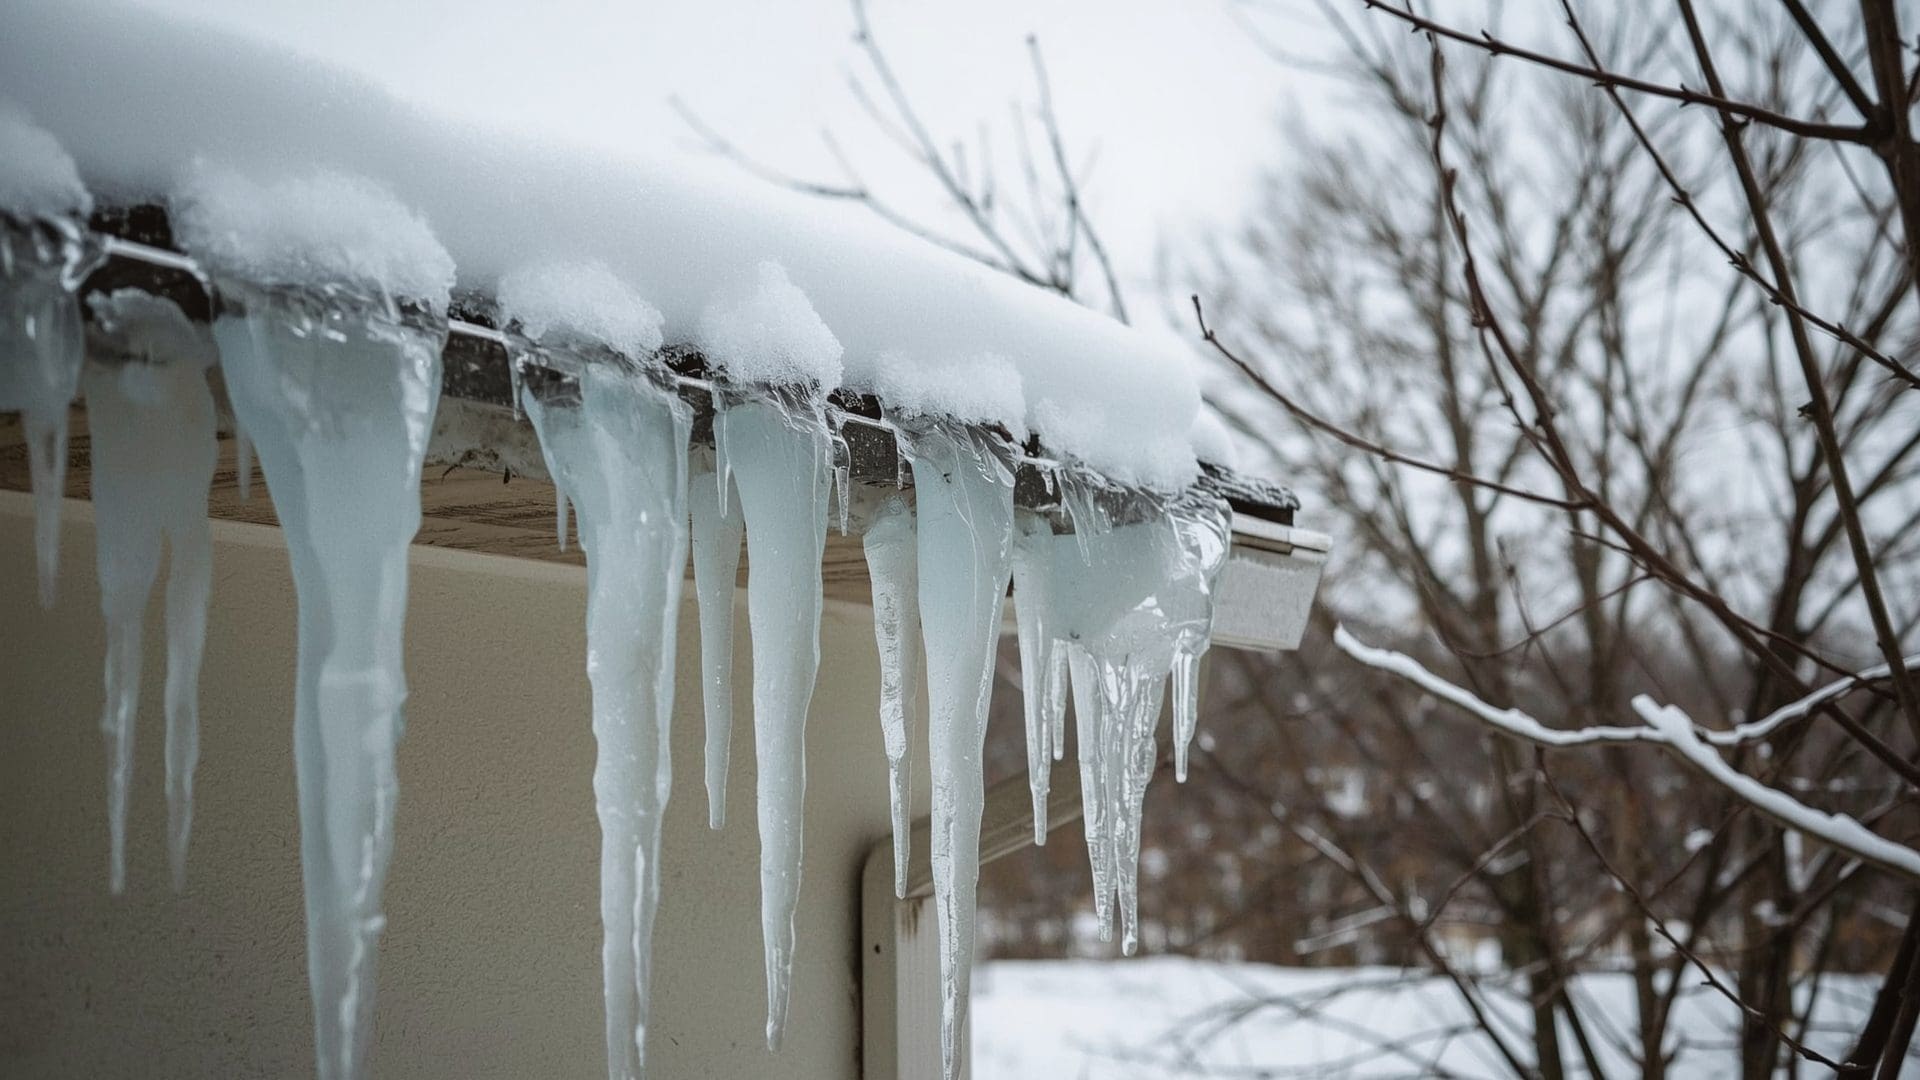
Quick Answer: Ice dams form when attic heat warms the upper roof, melting snow. That water runs down to the cold eaves and refreezes into a ridge of ice. The dam then traps more meltwater, which backs up under shingles and leaks inside.
The process starts in your attic. When your living space is heated, some of that warmth rises and escapes through the ceiling. If your attic lacks enough insulation, that heat warms the roof deck directly above it.
The upper roof surface gets warm enough to melt the snow sitting on it. That meltwater flows down toward the eaves, which hang past the exterior wall. The eaves stay cold because there is no warm attic space beneath them.
When the meltwater hits the cold eaves, it refreezes. Over several freeze-thaw cycles, that ice builds into a ridge called an ice dam. Water behind the dam has nowhere to go except under your shingles.
Why Are the Eaves Always the Problem Zone?
The eaves overhang the exterior wall, so they are exposed to outdoor temperatures on three sides. No insulation sits below them to keep them warm. This temperature difference between the upper roof and the eaves is what creates the dam.
Homes with steep pitches, north-facing roof slopes, or shallow overhangs tend to see more severe ice dams. Complex roof geometry, like valleys and dormers, also creates natural collection points for ice.
What Conditions Make Ice Dams Worse?
Three factors accelerate ice dam formation:
- Heavy snowfall — More snow means more insulation on the roof, trapping heat from below and increasing melt rate.
- Air leaks in the attic floor — Gaps around light fixtures, pipes, and attic hatches dump warm air directly onto the roof deck.
- Inadequate attic ventilation — Without airflow, heat accumulates under the roof rather than being flushed out continuously.
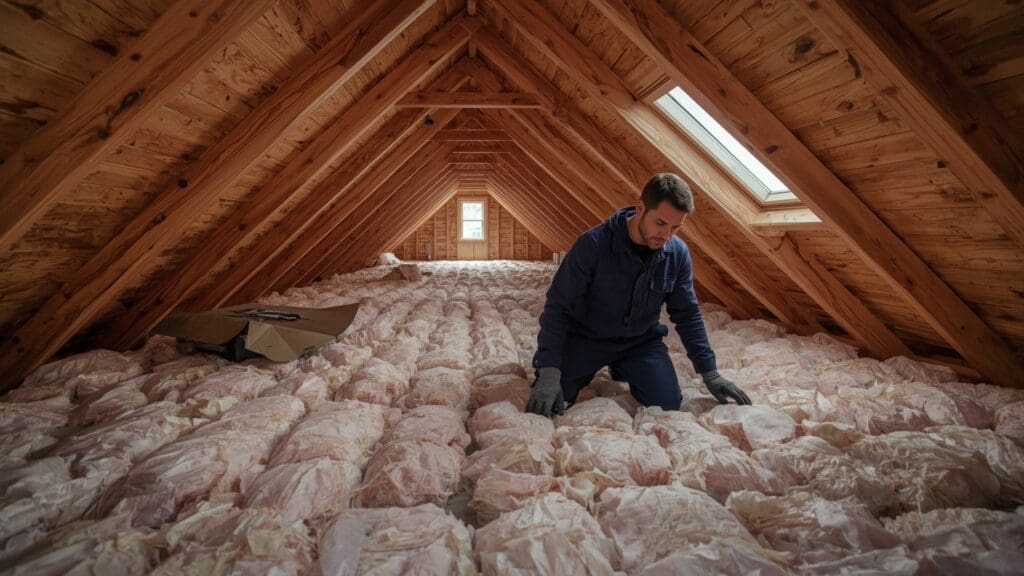
How Does Attic Insulation Prevent Ice Dams?
Quick Answer: Attic insulation keeps heat inside your living space instead of letting it escape through the ceiling. A cold, evenly insulated attic means the roof surface stays uniformly cold, so snow melts at the same rate across the whole roof instead of just in the middle.
Think of attic insulation as a thermal barrier between your heated rooms and the cold roof deck above. When that barrier is thick enough and covers the entire attic floor without gaps, the roof deck above it stays close to the outdoor temperature.
A uniformly cold roof means snow sits on it without melting unevenly. No meltwater, no ice dam.
What R-Value Do You Need to Prevent Ice Dams?
R-value measures how well insulation resists heat flow. Higher numbers mean better resistance. The right target depends on your climate zone, but most cold-climate homes are significantly under-insulated.
| Climate Zone | Example Cities | Minimum R-Value (DOE) | Recommended R-Value | Approximate Blown-In Depth |
|---|---|---|---|---|
| Zone 4 (Mixed-Cold) | St. Louis, MO; Seattle, WA | R-38 | R-49 | 14–15 inches |
| Zone 5 (Cold) | Chicago, IL; Denver, CO | R-49 | R-60 | 17–19 inches |
| Zone 6 (Very Cold) | Minneapolis, MN; Burlington, VT | R-49 | R-60 | 17–19 inches |
| Zone 7 (Subarctic) | Fairbanks, AK; International Falls, MN | R-60 | R-60+ | 19–21 inches |
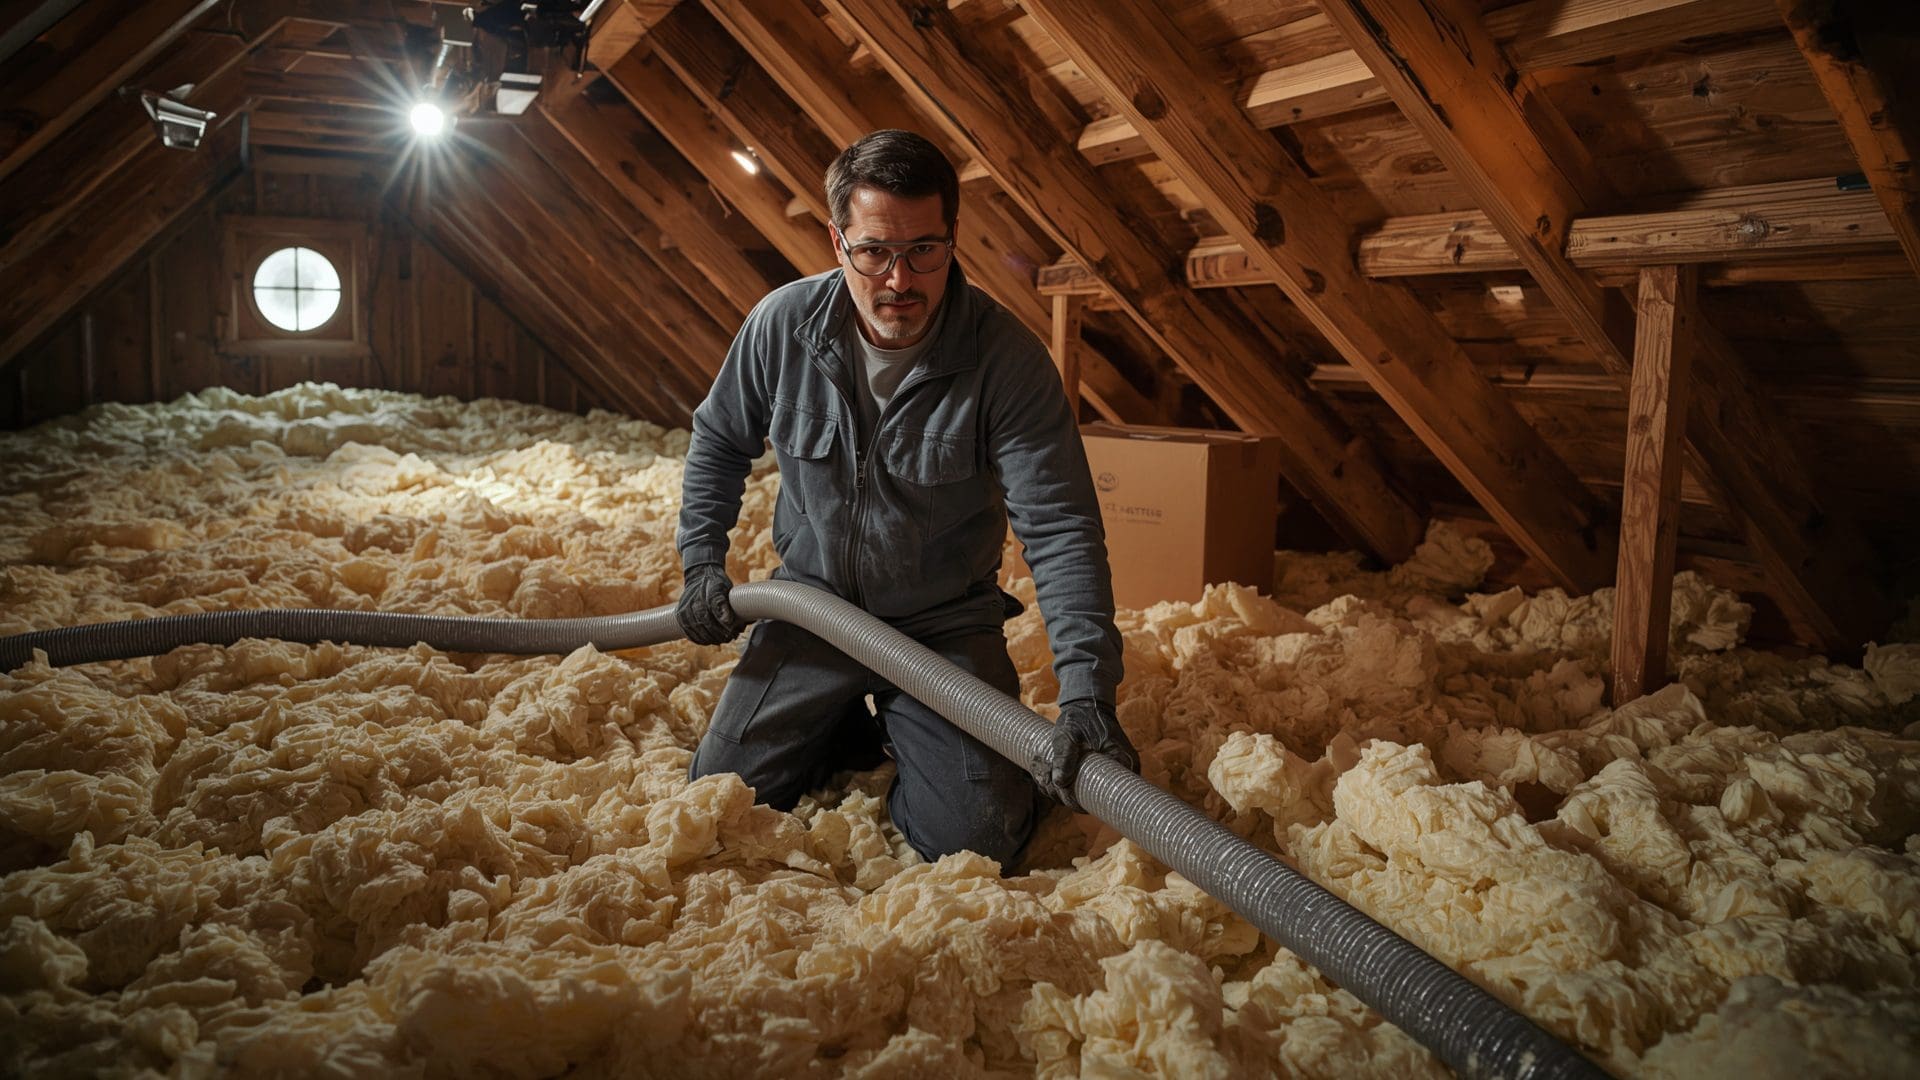
Which Type of Attic Insulation Works Best?
You have three practical options for retrofitting an existing attic:
- Blown-in cellulose (R-3.7 per inch) — Made from recycled paper, settles well around obstacles, and is a cost-effective option for most retrofits. Cost: $1.00–$1.50 per square foot installed.
- Blown-in fiberglass (R-2.5 per inch) — Lighter than cellulose and resistant to moisture absorption. Needs more depth to hit target R-values. Cost: $1.00–$1.50 per square foot installed.
- Spray foam at the roof deck (R-6.5 per inch) — Applied to the underside of the roof sheathing instead of the attic floor, creating a “hot roof” design. Most expensive option at $3.00–$7.00 per square foot but eliminates the need for ventilation in that section.
Why Do Air Leaks Matter as Much as Insulation?
A single two-inch gap around a recessed light fixture can transfer more heat into the attic than missing several inches of insulation. Air sealing must happen before you add insulation.
Common air leak points in an attic floor include:
- Recessed (can) light fixtures penetrating the ceiling
- Plumbing and electrical chase openings
- Attic hatch covers without weather stripping
- Top plates of interior walls
- Bathroom exhaust fan housings
Seal these with fire-rated caulk or rigid foam and acoustical sealant before blowing in insulation. Skipping this step wastes your insulation investment.
How Does Attic Ventilation Help Prevent Ice Dams?
Quick Answer: Attic ventilation pulls cold outdoor air in through soffit vents at the bottom and exhausts warmer air out through ridge vents at the top. This keeps the entire roof deck uniformly cold, preventing the warm spots that trigger snow melt and ice dam formation.
Insulation keeps heat from rising through the attic floor. Ventilation handles any residual heat that still builds up in the attic space. The two systems work together — insulation reduces heat load, ventilation flushes the rest.
What Is the Correct Ventilation Ratio for an Attic?
The standard building code guideline is 1 square foot of net free ventilation area (NFVA) for every 150 square feet of attic floor space. If you have a continuous vapor barrier on the attic floor, you can reduce that ratio to 1:300.
The ventilation should be balanced with roughly 50% intake at the soffits and 50% exhaust at the ridge or near the peak. Unbalanced systems — like all exhaust and no intake — can pull conditioned air from the living space into the attic, making ice dam risk worse.
What Are the Main Types of Attic Vents?
| Vent Type | Position | Function | NFVA per Unit | Best Use Case |
|---|---|---|---|---|
| Continuous Soffit Vent | Intake | Draws cold air along eaves | 9–18 sq in per linear foot | Homes with deep soffits |
| Ridge Vent (baffled) | Exhaust | Exhausts warm air at peak | 12–18 sq in per linear foot | Simple gable or hip roofs |
| Box Vent (static) | Exhaust | Passive hot air release | 50–55 sq in per unit | Older homes without ridge |
| Soffit Baffles (rafter channels) | Airflow guide | Keeps insulation from blocking soffits | N/A | All blown-in insulation retrofits |
| Gable Vent | Cross-ventilation | Wind-driven air exchange | 150–300 sq in per unit | Gable-end roofs only |
Soffit baffles deserve special attention. When you blow insulation into the attic, it can pile up and block the soffit openings. Baffles are cardboard or rigid foam channels stapled between rafters, running from the soffit opening up past the wall plate. They keep a clear airflow path regardless of how deep your insulation gets.
Do Heat Cables Actually Prevent Ice Dams?
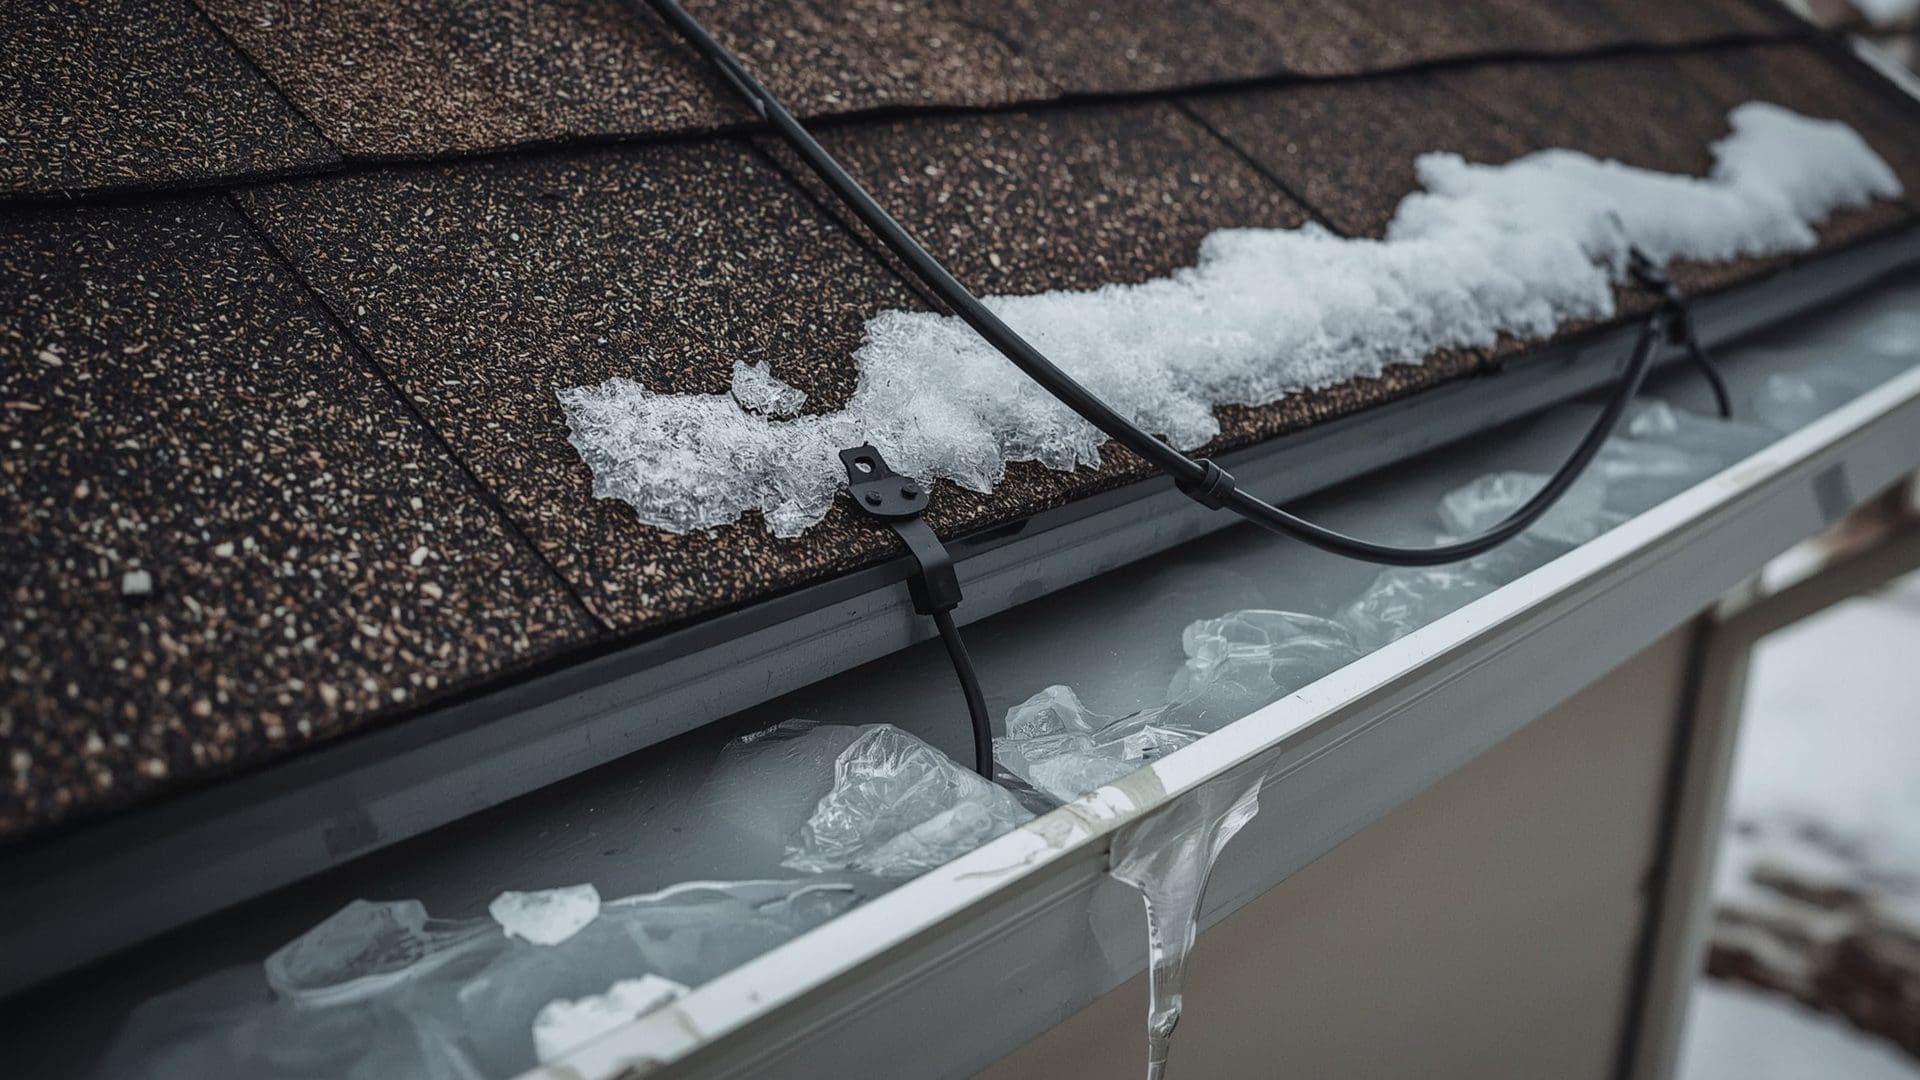
Quick Answer: Heat cables do not prevent ice dams — they manage where ice builds up. Self-regulating cables installed in a zigzag pattern along the eaves and inside gutters keep meltwater flowing instead of freezing, reducing water backup. They are a mitigation tool, not a root cause solution.
Heat cables (also called heat tape or de-icing cables) work by maintaining a channel in the ice so water can drain off the roof instead of pooling behind a dam. They are most useful for homeowners who cannot easily access their attic to improve insulation, or who have complex roof geometry where ice always collects.
What Types of Heat Cables Are Available?
| Type | How It Works | Energy Use | Cost per Linear Foot | Lifespan |
|---|---|---|---|---|
| Self-Regulating Cable | Increases heat output as temperature drops, reduces output as it warms | 3–12 watts/ft (variable) | $3–$8 | 10–20 years |
| Constant Wattage Cable | Produces fixed heat output regardless of temperature | 5–10 watts/ft (fixed) | $1–$3 | 5–10 years |
| Roof Panel / Mat System | Pre-formed panels installed under shingles at eaves | 20–45 watts/sq ft | $10–$25 | 15–25 years |
How Do You Install Heat Cables Correctly?
Installation method matters. Cables installed incorrectly — laid flat in straight runs along the eave — do not create effective drainage paths. The correct approach for standard shingle roofs uses a zigzag or loop pattern:
- Start at the lowest point of the gutter drain outlet.
- Loop the cable up the roof in a zigzag, with each loop rising 6–12 inches above the eave edge.
- Run the cable inside the gutter along the full length.
- Loop down into each downspout opening by at least 3 feet so meltwater can drain completely.
- Secure with plastic roof clips designed for your shingle type — never staple or nail through the cable jacket.
Self-regulating cables can touch themselves without overheating, which makes the zigzag installation straightforward. Constant wattage cables cannot touch themselves and require careful spacing.
What Is the Best Long-Term Ice Dam Prevention Strategy?
Quick Answer: The most effective long-term strategy is air sealing every penetration in the attic floor, then adding insulation to your climate zone’s recommended R-value, and ensuring balanced soffit-to-ridge ventilation. This three-step approach eliminates the heat differential that causes ice dams in the first place.
No single product solves ice dams. The fix is a system. Air sealing stops the biggest sources of heat transfer. Insulation reduces background heat loss across the attic floor. Ventilation flushes residual warmth before it can warm the roof deck.
If you address all three, you eliminate the temperature differential between the upper roof and the eaves. No differential means no selective melting. No selective melting means no ice dam.
What Is the Priority Order for Improvements?
- Air sealing first — Cheap, high-impact, and required before insulation to be effective. Budget: $200–$800 DIY for materials.
- Add or top up insulation — Most attics need additional depth. Budget: $1,500–$4,000 for a professionally insulated 1,500 sq ft attic.
- Verify and improve ventilation — Check that soffit vents are not blocked by existing insulation and that ridge venting is continuous.
- Install heat cables as supplemental protection — Focus on known problem areas like valleys, dormers, and north-facing eaves.
Should You Consider an Ice and Water Shield Membrane?
An ice and water shield is a self-adhering waterproofing membrane applied directly to the roof deck under the shingles at the eaves. It is not an ice dam prevention strategy — the ice dam still forms on top of it. But it is a critical last line of defense.
If water does back up under your shingles, the ice and water shield prevents it from penetrating the roof deck and entering your home. Most building codes require it on the first 24–36 inches of roof measured from the eave edge in cold climates. In areas with severe winters, extending coverage 6 feet up from the eave edge or to a point 24 inches inside the exterior wall line provides better protection.
How Do You Remove an Ice Dam Without Damaging Your Roof?

Quick Answer: The safest removal method is calcium chloride in a nylon stocking laid perpendicular across the ice dam, which melts a drainage channel over several hours. For large dams, hire a professional using a low-pressure steam system — it melts ice without damaging shingles or voiding roofing warranties.
Ice dams harden to the shingles and granule surface. Any mechanical force — picks, ice chippers, or even aggressive shoveling — risks tearing granules off asphalt shingles, cracking older brittle shingles, and exposing the underlying felt or membrane to water infiltration.
What Is the Calcium Chloride Method?
Calcium chloride is a de-icing salt that melts ice at temperatures as low as minus 25°F. It is safer for shingles and vegetation than rock salt (sodium chloride), which can damage asphalt and kill plants.
Here is how to use it for ice dam removal:
- Fill a nylon tube sock or pantyhose leg with calcium chloride ice melt pellets.
- Lay the filled tube perpendicular across the ice dam, with one end pointing toward the eave.
- Allow 4–12 hours for the calcium chloride to melt a drainage channel through the dam.
- Once a channel forms, meltwater behind the dam drains off instead of backing up under shingles.
Do not use this method on metal roofs without checking compatibility. Calcium chloride can cause minor surface corrosion on some uncoated metals over repeated seasons.
When Should You Hire a Professional for Ice Dam Removal?
Call a professional when the ice dam is more than 6 inches thick, when you can already see water stains on interior ceilings, or when the dam covers a large section of the roof and you cannot safely access the area from the ground.
Professional contractors use low-pressure steam systems (around 25 PSI at 180–212°F) that melt ice quickly without blasting shingles or forcing water further under the roof. A standard residential job runs $400–$1,500 depending on roof size and ice dam severity.
What Roof Raking Techniques Reduce Ice Dam Risk?
A roof rake is an aluminum or plastic blade on a telescoping pole. You use it from the ground to pull fresh snow off the lower 3–4 feet of your roof before it can contribute to ice dam growth. This is a preventive step, not a removal technique for existing dams.
Use a roof rake after each significant snowfall (more than 6 inches). Work from the eave edge upward in short strokes. Never stand on the roof to rake — roof surfaces are slick in winter conditions. Plastic or foam-edged rakes are less likely to gouge shingles than bare metal blades.
What Are the Warning Signs That an Ice Dam Is Causing Damage?
Quick Answer: Look for water stains on ceilings or interior walls near the eaves, peeling paint on exterior trim, ice buildup on siding below the roofline, visible icicles thicker than 2 inches along the gutters, and sagging or detached gutters from ice weight.
| Warning Sign | What It Indicates | Urgency | Required Action |
|---|---|---|---|
| Water stains on ceiling near eaves | Active water infiltration under shingles | High | Remove dam immediately, inspect attic for moisture |
| Peeling paint on exterior siding | Moisture wicking through wall from backed-up water | Medium | Inspect roof edge and gutter connection |
| Ice on exterior wall or siding | Overflow from dam running down the exterior | Medium | Check for gutter damage and soffit blockage |
| Sagging or detached gutters | Ice weight exceeding gutter capacity (20–30 lbs per linear foot) | High | Remove ice load, re-hang or replace gutters after thaw |
| Attic insulation wet or compressed | Ongoing moisture infiltration reducing thermal performance | High | Replace damaged insulation, fix water source first |
| Musty smell in attic after winter | Mold or mildew growth from seasonal moisture | Medium | Test for mold, inspect sheathing for rot |
How Much Does Ice Dam Prevention Cost?
Quick Answer: Air sealing costs $200–$800 DIY or $1,000–$2,500 professionally. Adding attic insulation to Zone 5 specs runs $1,500–$4,000 for a 1,500 sq ft attic. Heat cable installation ranges from $300–$900 for a standard eave run. Doing all three provides the most reliable long-term protection.
What Is the Cost Comparison Between Prevention and Repair?
Prevention is significantly cheaper than repair. A single ice dam event causing water infiltration into the ceiling and wall cavity can cost $2,500–$15,000 to remediate. That includes drywall replacement, mold treatment, and potential roof deck repairs.
| Action | DIY Cost | Professional Cost | Lifespan of Fix |
|---|---|---|---|
| Attic air sealing | $200–$800 | $1,000–$2,500 | 20+ years |
| Blown-in insulation (1,500 sq ft) | $600–$1,200 | $1,500–$4,000 | 30–50 years |
| Self-regulating heat cables (50 ft run) | $150–$400 | $300–$900 | 10–20 years |
| Ice dam removal (professional) | N/A | $400–$1,500 per event | Single season |
| Water damage repair (ceiling + wall) | N/A | $2,500–$15,000 | N/A (reactive) |
Frequently Asked Questions
Can gutters cause ice dams?
Gutters do not cause ice dams, but they can make them worse. When gutters fill with ice, the overflow can push back against the roof edge and create additional pooling at the eaves. Cleaning gutters before winter and ensuring downspouts drain freely reduces this risk.
Does roof pitch affect ice dam risk?
Yes. Low-slope roofs (below a 3:12 pitch) see more ice dam problems because meltwater moves slowly and has more time to refreeze before reaching the eave. Steep roofs shed snow and water faster, which reduces the time water spends in the freezing zone near the eave edge.
Can spray foam insulation eliminate ice dams entirely?
Closed-cell spray foam applied to the underside of the roof deck creates a sealed, conditioned attic space with no temperature differential across the roof surface. In well-executed installations, this effectively eliminates ice dam formation. It is the most expensive option but removes the need for separate ventilation management.
Is it safe to walk on the roof to remove an ice dam?
No. Roofs covered in ice or compacted snow are extremely slippery and pose a serious fall risk. Use a roof rake from the ground to remove fresh snow, apply calcium chloride in a stocking from the eave edge, or hire a professional with safety harnesses and proper equipment.
Will homeowners insurance cover ice dam damage?
Most standard homeowners insurance policies cover sudden water damage from ice dams, including ceiling and wall repairs. However, insurers can deny claims if they determine the damage resulted from long-term neglect of insulation or maintenance. Document your attic conditions and keep records of any prevention work you perform.
How do I know if my attic has enough ventilation?
Measure your total attic floor area in square feet and divide by 150. That gives you the minimum net free ventilation area (NFVA) in square feet required. Then check the label on your soffit and ridge vents for their rated NFVA. If your total is below the calculated minimum, you need additional venting.