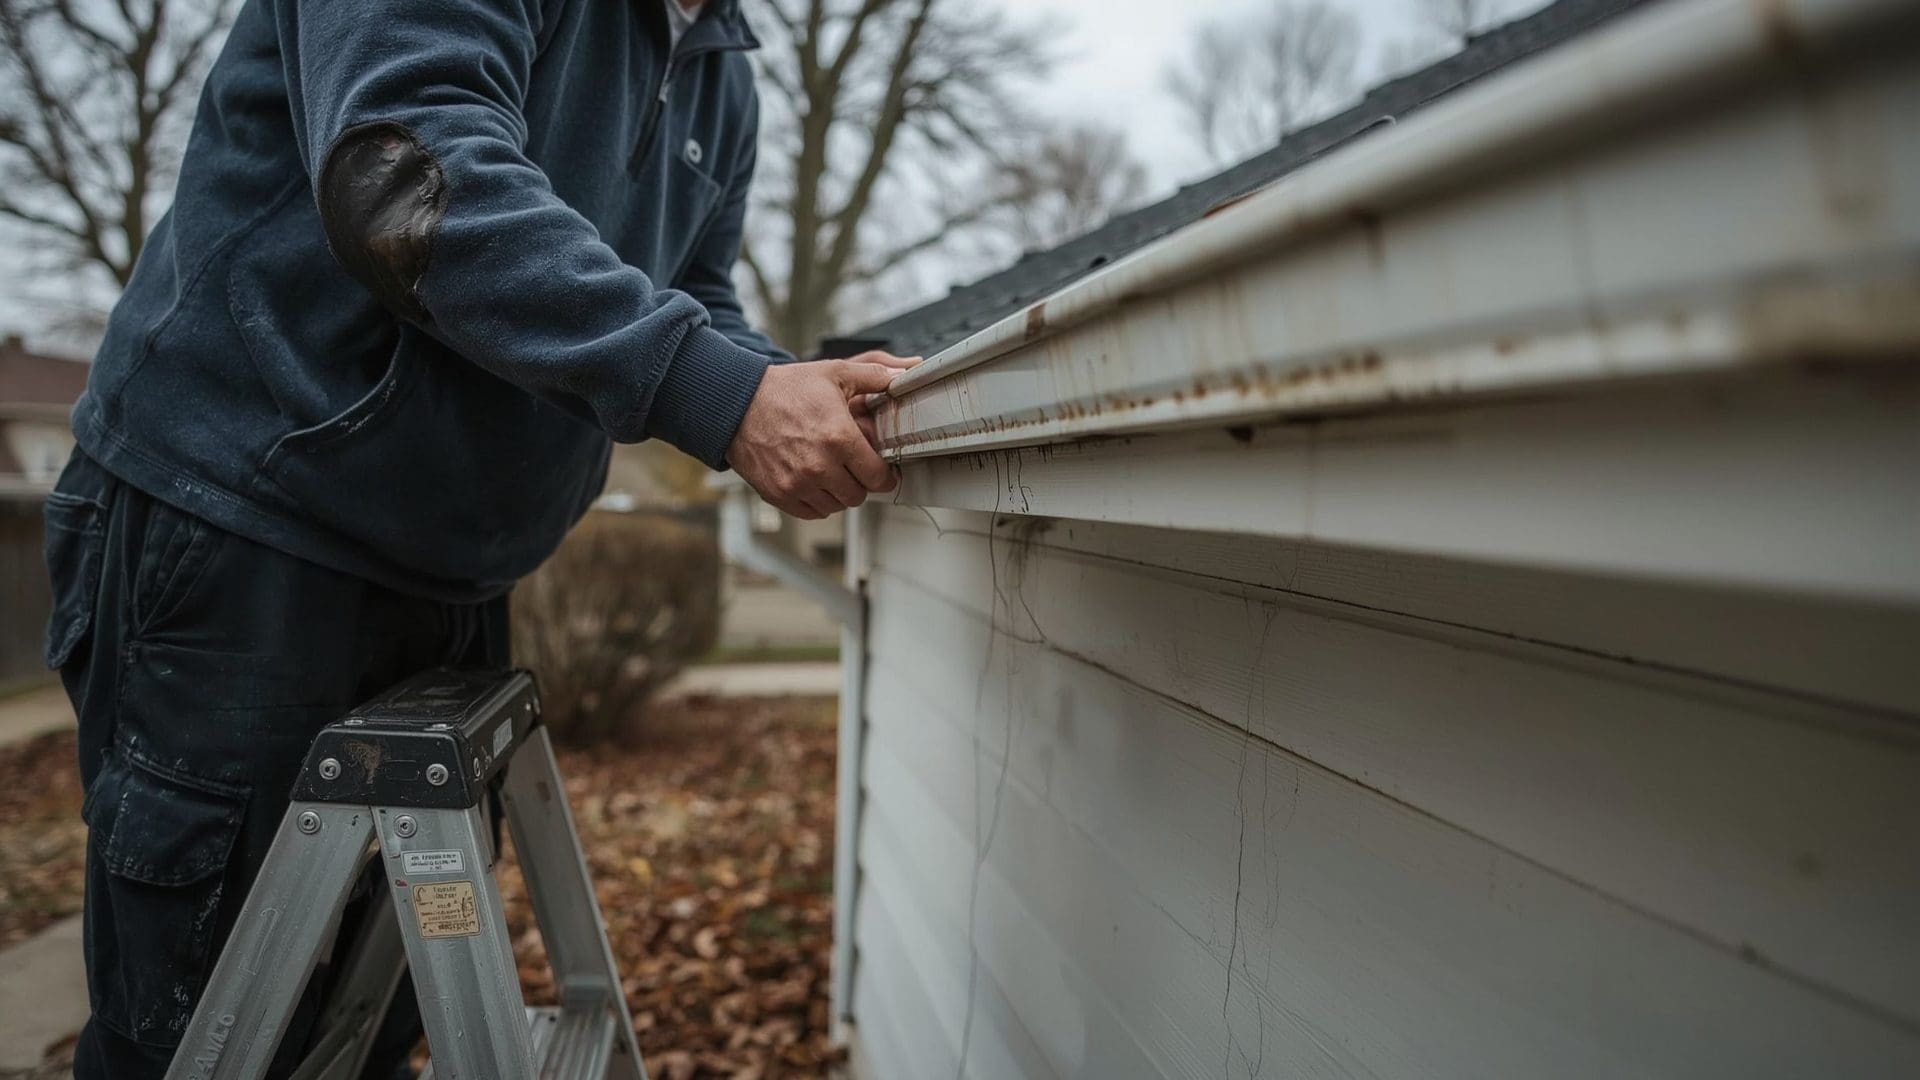
Roof flashing is the thin metal that seals the joints where your roof meets a wall, chimney, valley, or edge. It’s not glamorous, but it’s responsible for keeping water out of places it absolutely cannot go. When flashing fails, water follows the path of least resistance straight into your home.
Most roof leaks don’t come from damaged shingles. They come from failed flashing. Understanding how flashing works — and how to fix it — can save you from a repair bill that runs into thousands of dollars.
Key Takeaways
- Flashing fails before shingles do — Most roof leaks trace back to cracked, lifted, or corroded flashing, not damaged shingles.
- There are four main flashing types — Step, counter, valley, and drip edge each protect a different part of your roof.
- Material choice matters — Galvanized steel, aluminum, and copper each have different lifespans, costs, and compatibility considerations.
- Resealing vs. full replacement — Minor cracks can be sealed. Lifted, corroded, or missing flashing needs to be replaced entirely.
- DIY has limits — Chimney flashing and counter flashing often require masonry work best left to a professional.
What Is Roof Flashing and Why Does It Fail?

Quick Answer: Roof flashing is metal sheeting installed at roof joints and penetrations to redirect water away from vulnerable seams. It fails due to thermal expansion, sealant breakdown, corrosion, or poor original installation — usually showing up as rust stains, lifted edges, or interior water spots.
Every time your roof heats up during the day and cools at night, the metal flashing expands and contracts slightly. Over years, this movement loosens fasteners and cracks the sealant that holds flashing in place. Once water finds even a hairline gap, it works its way under the flashing and into the roof deck below.
Corrosion is the other main culprit. Galvanized steel flashing can start rusting within 15 to 20 years, especially in humid climates or areas with heavy rainfall. Aluminum flashing lasts longer but can oxidize when it contacts concrete or masonry. Poor installation — too few fasteners, wrong overlap, or missing step flashing — speeds up every failure mode.
Common Signs of Flashing Failure
- Water stains on ceilings near chimneys, skylights, or dormers
- Rust streaks running down exterior walls below rooflines
- Visible gaps between the flashing and the surface it’s sealing
- Buckled or lifted metal edges along the roof perimeter
- Missing sections of flashing after a storm
- Peeling paint on interior walls or ceilings near roof penetrations
What Are the Main Types of Roof Flashing?
Quick Answer: The four main types are step flashing (along sidewalls), counter flashing (at chimneys and masonry), valley flashing (at roof V-joints), and drip edge flashing (along the eaves and rakes). Each protects a different high-risk zone where water tends to collect or run.
Step Flashing
Step flashing protects the joint where a sloped roof meets a vertical wall — like the side of a dormer or an adjoining wall. It consists of small, L-shaped metal pieces installed one per shingle course, overlapping like stair steps. Each piece is nailed to the roof deck, with one flange under the shingle and the other against the wall.
Step flashing is highly effective because it moves with the roof structure. However, if any single piece is improperly nailed, corroded, or missing, that section becomes a direct path for water entry.
Counter Flashing
Counter flashing (sometimes called cap flashing) is the upper layer installed over step flashing or base flashing at chimneys and masonry walls. It’s typically embedded into mortar joints or cut into the masonry itself, then bent down over the base flashing below.
Counter flashing is one of the hardest flashing types to repair properly. The mortar joint must be re-cut, the flashing re-embedded, and the joint re-pointed. Cutting into masonry incorrectly can cause more damage than the original leak.
Valley Flashing
Valley flashing covers the V-shaped channel where two roof slopes meet. It handles a high volume of water flow, especially during heavy rain. Valley flashing comes in two styles: open valley (metal is exposed and visible) and closed valley (shingles overlap and cover the metal beneath).
Open valleys use a wider metal channel — typically 24 inches wide — and are easier to inspect and maintain. Closed valleys look cleaner but are harder to repair without removing shingles.
Drip Edge Flashing
Drip edge is an L-shaped metal strip installed along the eaves (bottom edge) and rakes (sloped sides) of the roof. Its job is to direct water off the edge and away from the fascia board and soffit below. Without it, water can wick back under the shingles by capillary action and rot the roof deck edge.
Most building codes require drip edge on new installations. If yours is missing, buckling, or pulling away from the fascia, it’s worth replacing before the fascia sustains wood rot damage.
Which Roofing Flashing Material Should You Choose?
Quick Answer: Galvanized steel is the most common and affordable option. Aluminum is lightweight and corrosion-resistant but reacts with masonry. Copper is the most durable and long-lasting but costs significantly more. Match your material to your roof type, climate, and budget.
| Material | Average Cost Per Linear Foot | Lifespan | Best Use | Key Limitation |
|---|---|---|---|---|
| Galvanized Steel | $0.75 – $1.50 | 15 – 25 years | General purpose, most roof types | Prone to rust in humid climates |
| Aluminum | $0.90 – $2.00 | 20 – 30 years | Lightweight roofs, low-slope sections | Reacts chemically with concrete and masonry |
| Copper | $5.00 – $10.00 | 50 – 70+ years | High-end roofs, historic homes, chimneys | High upfront cost, expands and contracts more |
| Lead | $2.50 – $5.00 | 50 – 200 years | Chimney and masonry applications | Health and disposal regulations limit use |
| Stainless Steel | $3.00 – $6.00 | 50 – 70 years | Coastal environments, high-corrosion areas | Harder to cut and form on-site |
How Do You Repair Step Flashing?
Quick Answer: To repair step flashing, remove the shingles above the damaged section, pry out the old flashing pieces, slide new L-shaped pieces into place one per shingle course, nail each piece to the roof deck only (not the wall), then reinstall the shingles. Use roofing nails and butyl tape for a watertight seal.
Tools and Materials Needed for Step Flashing Repair
- Flat pry bar and roofing shovel
- Tin snips for cutting metal
- Roofing nails (1.5-inch galvanized)
- New step flashing pieces (4 x 4-inch minimum, pre-bent L-shape)
- Roofing cement or butyl tape
- Replacement shingles matching your roof
Step-by-Step Process
- Remove shingles: Starting at the top of the damaged area, carefully pry up shingles using the flat bar. Avoid cracking shingles you plan to reuse.
- Remove old flashing: Pull each L-shaped piece out by removing the nail or lifting the tab. Note how each piece overlaps the one below it.
- Inspect the deck: Check the roof sheathing underneath for rot or soft spots. Replace any damaged wood before continuing.
- Install new flashing: Slide the first new piece into position with one flange flat on the roof deck and the other flush against the wall. Nail through the roof flange only — never nail through the wall flange.
- Overlap each piece: Each new flashing piece should overlap the one below it by at least 2 inches. Apply butyl tape between pieces at the overlap for added waterproofing.
- Reinstall shingles: Lay shingles back over the flashing, nailing them through the shingle tabs according to the manufacturer’s nailing pattern.
How Do You Repair Valley Flashing Without Replacing the Whole Roof Section?
Quick Answer: For open valley flashing, you can patch small holes or seal lifted edges with metal flashing patches and roofing cement. For closed valleys, you’ll need to remove the overlapping shingles before accessing and replacing the metal liner. Full valley replacement is best if more than 20% of the channel shows damage.
Patching an Open Valley
Cut a metal patch from the same material as the existing valley flashing. The patch should extend at least 4 inches beyond the damaged area on all sides. Clean the surface with a wire brush to remove rust or debris, then apply a thin layer of roofing cement. Press the patch firmly into the cement and apply another layer of cement over the edges to seal them fully.
This repair works best on isolated pinhole rust spots or hairline cracks. If the valley shows widespread corrosion, the full metal liner needs replacement.
Replacing the Valley Liner
Full valley liner replacement requires removing the shingles along both sides of the valley down to the roof deck. Roll out the new metal or peel-and-stick membrane liner along the valley centerline. For metal liners, use clips to fasten the edges rather than nails through the liner face — nails create puncture points that eventually leak. Overlap sections by at least 12 inches and apply roofing cement at each overlap.
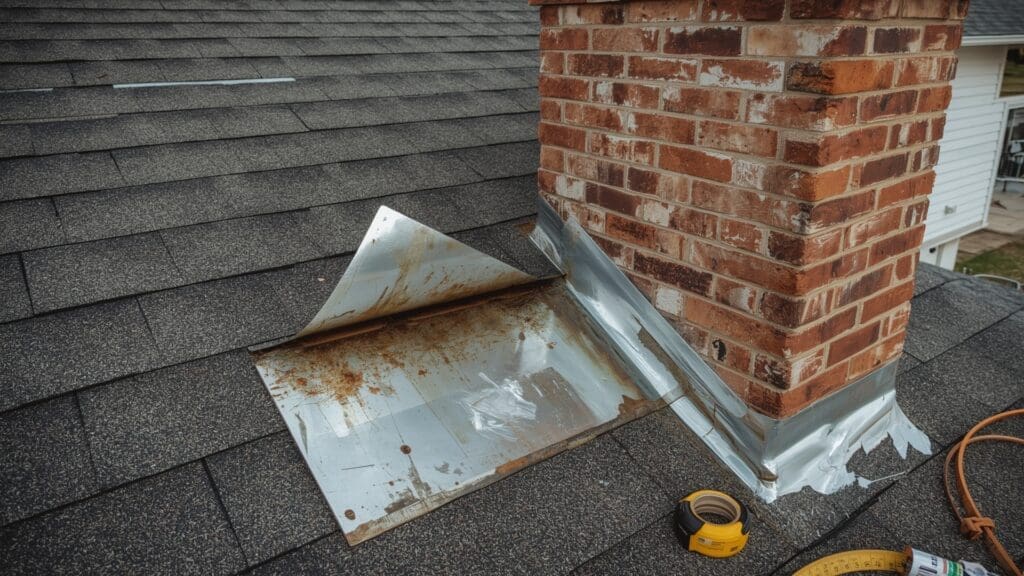
How Do You Repair Chimney Flashing?
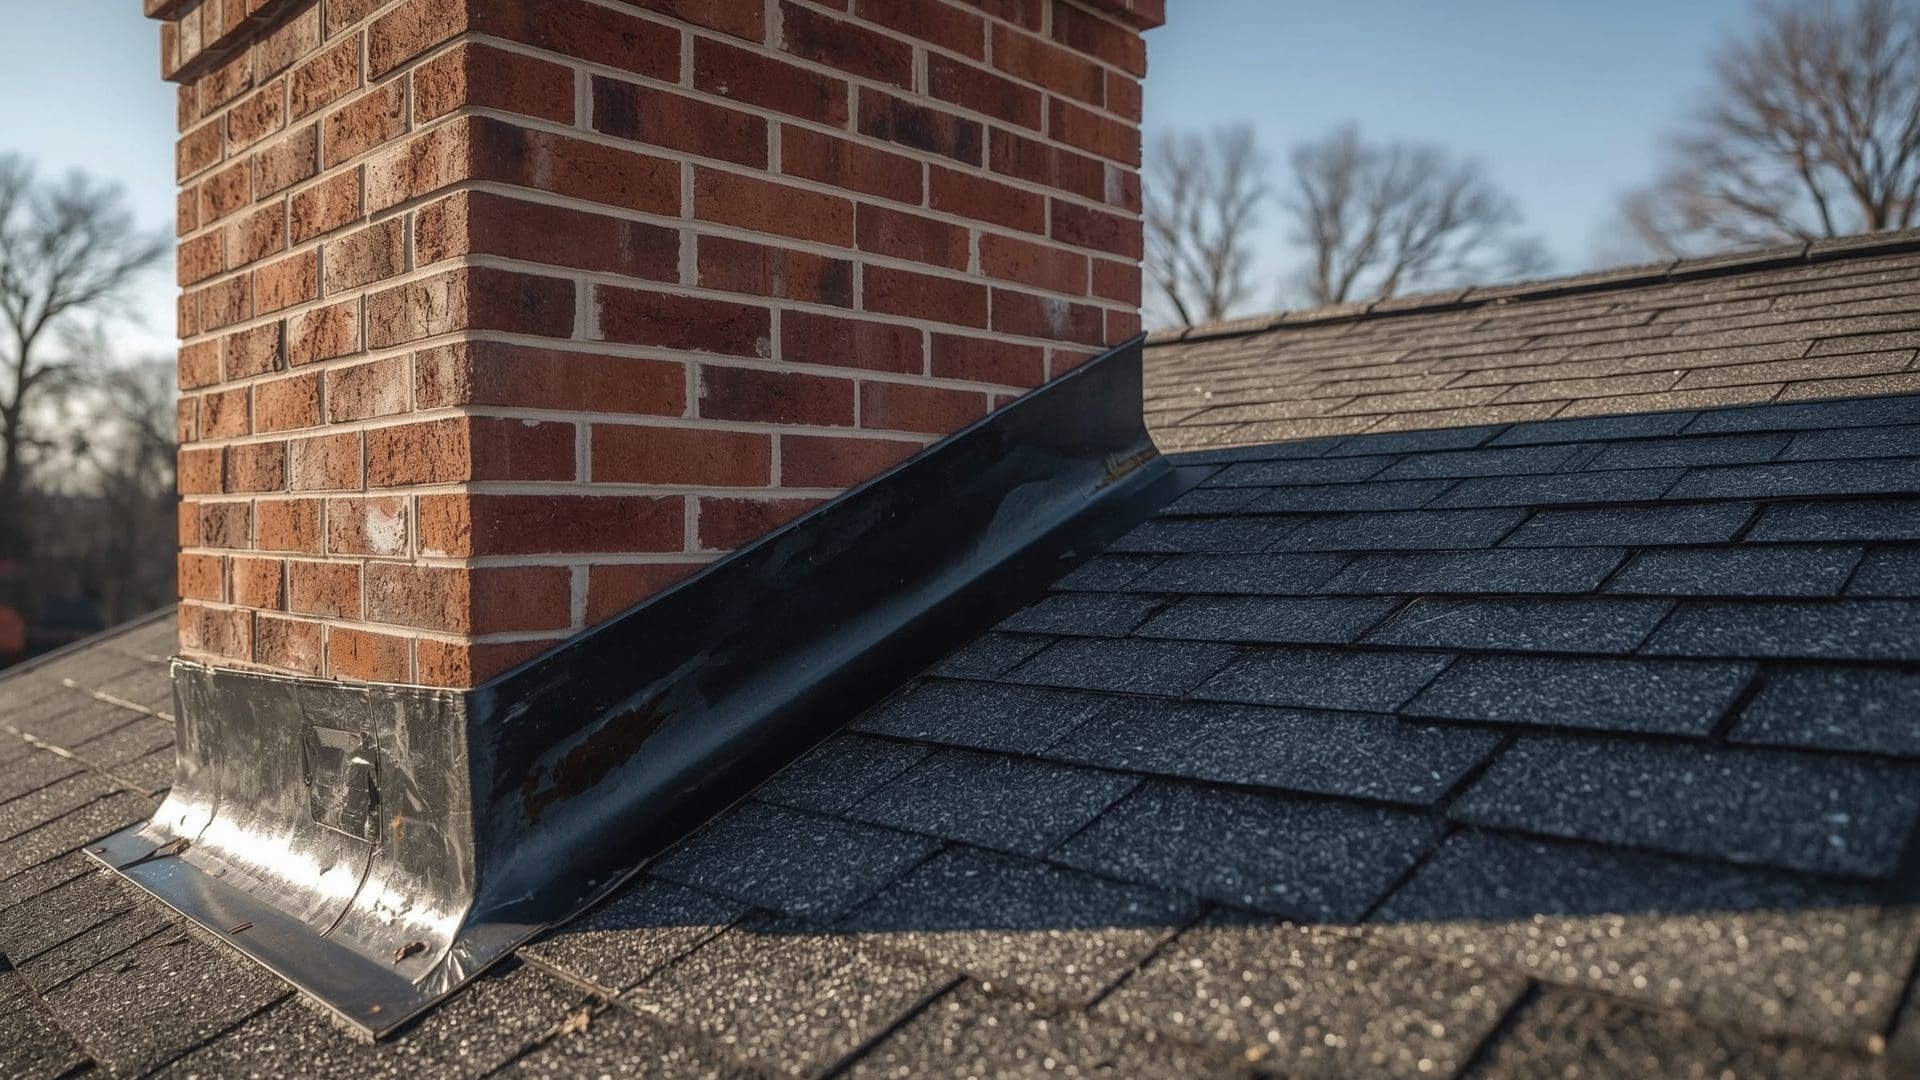
Quick Answer: Chimney flashing repair involves resealing or replacing the base flashing (around the bottom and sides of the chimney), step flashing (up the sides), and counter flashing (the upper cap embedded in the mortar joint). Minor resealing takes a few hours. Full replacement requires cutting mortar joints and typically takes a full day or more.
Chimney Flashing Components
| Component | Location | Function | Typical Replacement Cost (Labor + Material) |
|---|---|---|---|
| Base Flashing | Front (downslope) of chimney | Diverts water around the base | $150 – $300 |
| Step Flashing | Both sides of chimney | Channels water down the sides | $200 – $400 |
| Counter Flashing | Embedded in chimney mortar | Covers and seals base/step flashing | $300 – $600 |
| Saddle (Cricket) | Upslope side of wide chimneys | Diverts water away from back wall | $400 – $900 |
When Resealing Is Enough
If the flashing is still structurally sound but the sealant has cracked and pulled away, you can clean out the old sealant and apply a new bead of polyurethane or silicone-based sealant rated for roofing applications. This adds several years of protection without a full replacement.
Do not use standard caulk. It shrinks and cracks faster than purpose-made roofing sealant. Look for products labeled for metal-to-masonry bonding with a temperature range of at least -40°F to 250°F.
How Do You Repair or Replace Drip Edge Flashing?
Quick Answer: Replacing drip edge requires removing the first course of shingles along the affected edge, pulling out the old metal strip, and sliding the new drip edge under the roofing felt (underlayment) but over the fascia board. Nail every 12 inches and overlap sections by at least 2 inches at the joints.
Eave vs. Rake Drip Edge Installation
The installation order differs depending on where you’re working. Along the eaves (horizontal bottom edges), the drip edge goes directly on the roof deck before the underlayment is installed. Along the rakes (sloped side edges), the drip edge goes on top of the underlayment. Getting this order wrong directs water into the fascia instead of away from it.
If you’re replacing drip edge on an existing roof, you’ll need to lift the bottom edge of the underlayment to slide the new drip edge underneath along eaves. Along rakes, you simply tuck the new piece over the underlayment edge.
What Roofing Sealants Work Best for Flashing Repairs?
Quick Answer: Butyl rubber sealant and polyurethane roofing caulk are the best options for flashing repairs. Butyl tape works well for metal-to-metal joints. Polyurethane caulk handles metal-to-masonry gaps. Avoid silicone on surfaces that will be painted or where adhesion to metal is critical.
| Sealant Type | Best Application | Temperature Range | Expected Lifespan | Paintable |
|---|---|---|---|---|
| Butyl Rubber Tape | Metal-to-metal flashing joints | -30°F to 200°F | 10 – 20 years | No |
| Polyurethane Caulk | Metal-to-masonry, metal-to-wood | -40°F to 250°F | 10 – 15 years | Yes |
| Silicone Sealant | Skylights, metal-to-glass | -65°F to 400°F | 15 – 20 years | No |
| Roofing Cement (Asphalt) | Patching, sealing overlaps | -20°F to 180°F | 5 – 10 years | No |
When Should You Repair Flashing vs. Replace It Entirely?
Quick Answer: Repair if the flashing is structurally sound but the sealant has dried out or a small section has lifted. Replace it if you see rust through more than 30% of the surface, multiple lifted sections, cracks in the metal itself, or if the original installation was done incorrectly.
Repair Decision Criteria
| Condition | Repair | Replace |
|---|---|---|
| Dried or cracked sealant only | Yes | No |
| Surface rust, no pitting | Yes (wire brush + sealant) | No |
| Deep rust pitting or holes | No | Yes |
| Single lifted section | Yes (re-nail + reseal) | No |
| Multiple lifted sections | No | Yes |
| Flashing over 25 years old | Only if galvanized, no rust | Recommended |
| Improper original installation | No | Yes |
What Does Roof Flashing Repair Cost?
Quick Answer: Flashing repairs typically cost $150 to $500 for minor resealing or single-section fixes. Full flashing replacement around a chimney runs $600 to $1,500. Valley flashing replacement costs $400 to $1,200 depending on length. Material and local labor rates are the biggest cost variables.
Flashing Repair Cost Breakdown
| Repair Type | DIY Material Cost | Professional Total Cost | Typical Time |
|---|---|---|---|
| Resealing cracked flashing | $15 – $40 | $150 – $300 | 1 – 2 hours |
| Step flashing replacement (per section) | $30 – $80 | $300 – $600 | 2 – 4 hours |
| Valley flashing replacement | $60 – $150 | $400 – $1,200 | 4 – 8 hours |
| Chimney flashing (full system) | $120 – $300 | $600 – $1,500 | Full day |
| Drip edge replacement (per 50 linear ft) | $25 – $60 | $200 – $500 | 2 – 3 hours |
Can You Do Roof Flashing Repair Yourself?
Quick Answer: Yes, for resealing cracked sealant, reattaching a single lifted drip edge section, or patching an open valley. No, for chimney counter flashing requiring masonry work, full valley liner replacement, or any repair that involves working on a steep roof pitch above two stories. Safety and masonry skill requirements drive that line.
DIY-Friendly Flashing Repairs
- Resealing cracked sealant around step or base flashing
- Patching a small rust hole in open valley flashing
- Reattaching a single lifted drip edge section
- Replacing a few sections of step flashing on a low-slope roof
Repairs That Require a Professional
- Counter flashing embedded in mortar joints — requires masonry cutting tools and skill
- Full chimney flashing system replacement
- Any repair on a roof pitch steeper than 6:12 (6 inches of rise for every 12 inches of run)
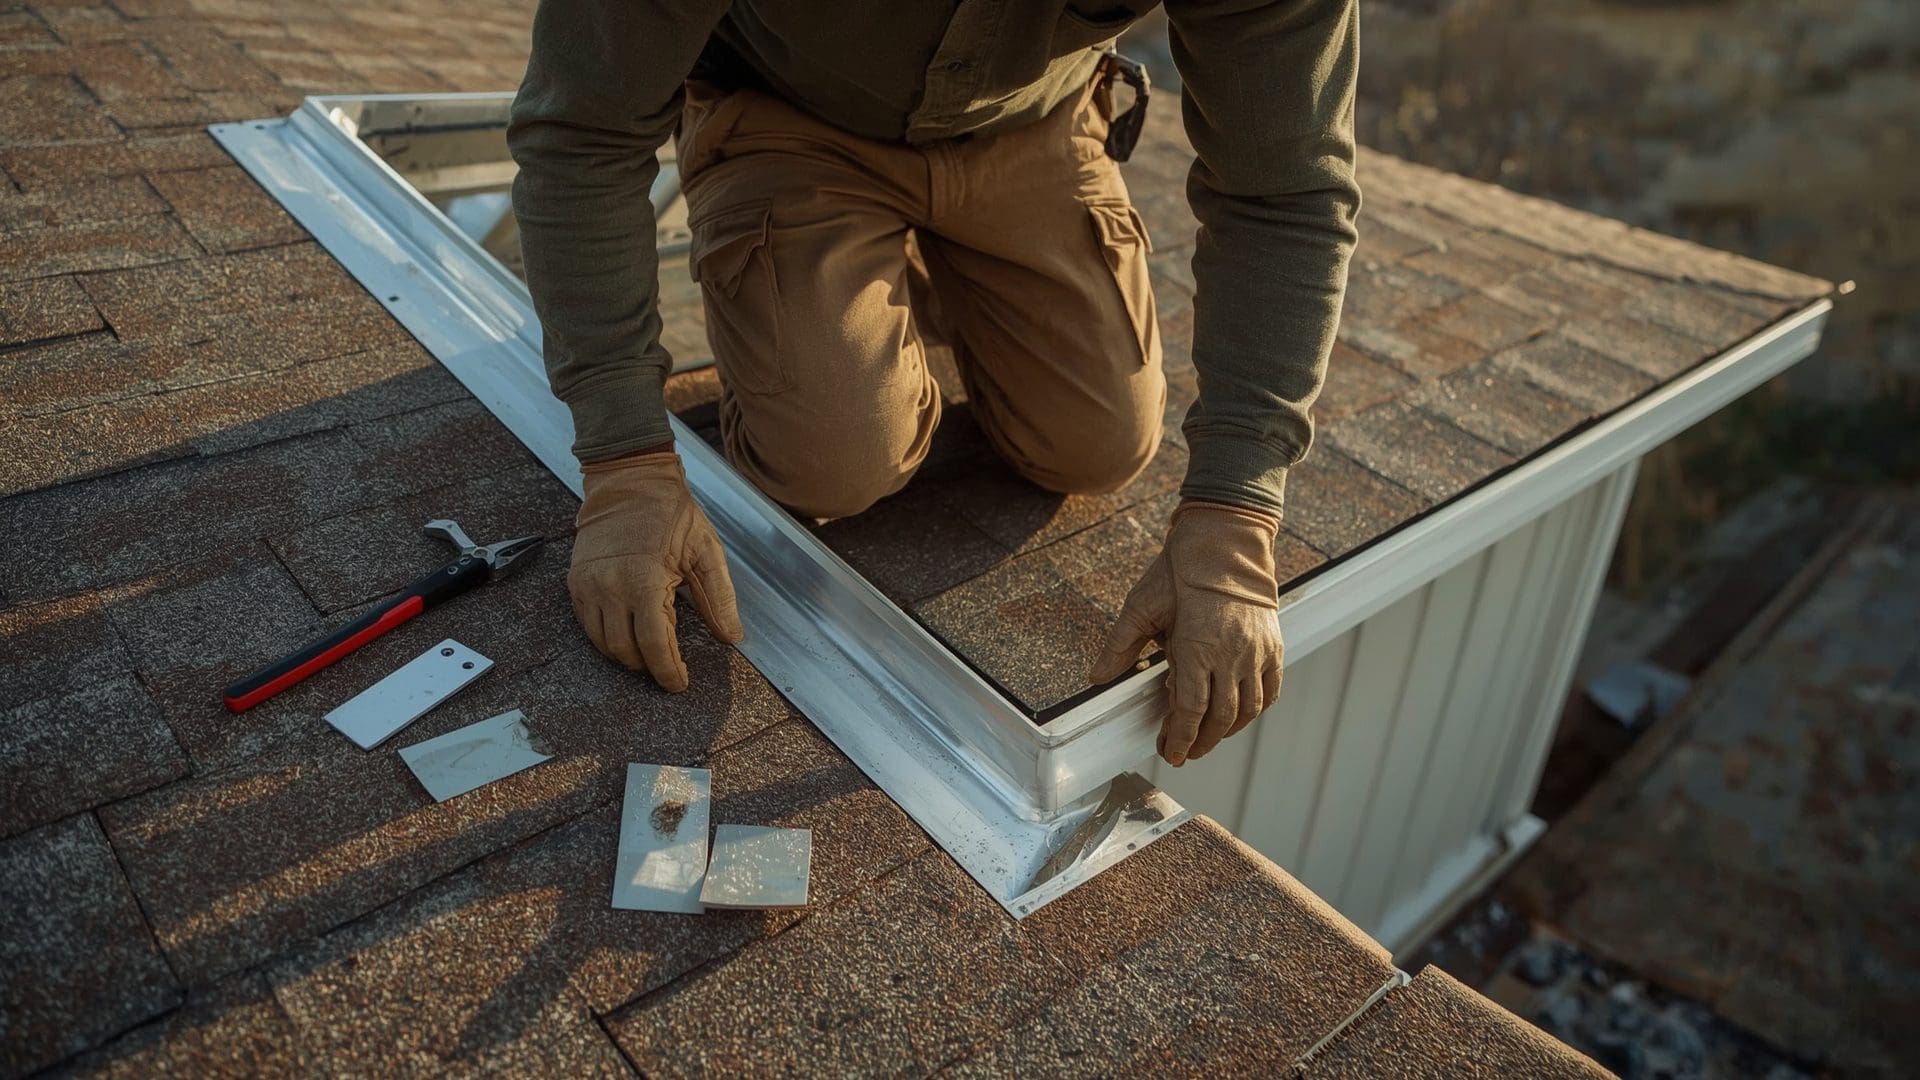
- Skylight flashing repair, which often involves removing the skylight unit itself
- Flashing around plumbing vents on roofs over 20 years old (related flashing and boot seals may also need replacement)
How Do You Prevent Flashing From Failing Again?
Quick Answer: Inspect your flashing every spring and fall, especially after heavy storms. Clear debris from valleys and around chimneys. Reseal any joints showing hairline cracks before they open fully. Choose higher-quality materials (copper or stainless steel) in high-wear zones to extend service life by 20 to 50 years compared to standard galvanized steel.
Annual Maintenance Checklist for Roof Flashing
- Inspect all step flashing sections for lifted or missing pieces after winter
- Check valley flashing for rust staining or debris buildup that traps moisture
- Examine sealant lines at chimney base and around skylights for cracking
- Clear leaves and pine needles from valley channels before they compact and hold water
- Look for rust streaks on exterior walls below rooflines — they signal active flashing corrosion
- After major storms, check drip edge along eaves for wind-lifted sections
Frequently Asked Questions About Roof Flashing Repair
How long does roof flashing last?
Galvanized steel flashing typically lasts 15 to 25 years. Aluminum lasts 20 to 30 years. Copper and stainless steel can last 50 years or more with minimal maintenance. Climate, installation quality, and roof design all affect how long any flashing system holds up.
Can I use roof cement to seal flashing instead of replacing it?
Roofing cement works as a short-term fix on minor cracks or lifted edges. It breaks down faster than proper metal-to-metal or metal-to-masonry sealants and needs reapplication every 3 to 7 years. If the metal itself is corroded or physically damaged, cement will not prevent leaks long-term.
What is the difference between base flashing and counter flashing?
Base flashing is the lower layer that sits on the roof surface and directs water away from the joint. Counter flashing is the upper layer that overlaps and caps the base flashing from above, usually embedded into a masonry joint. Both are needed to form a complete weatherproof system at chimneys and parapet walls.
Does homeowners insurance cover flashing repair?
Insurance typically covers flashing damage caused by a sudden event like a storm or falling tree branch. Gradual deterioration from age or lack of maintenance is usually excluded. Document storm damage with photos immediately and contact your insurer before making repairs to preserve your claim eligibility.
How do I find which piece of flashing is leaking?
The best method is a hose test. Have one person slowly run water over each section of the roof while another watches inside the attic with a flashlight. Start at the lowest point and work upward. The leak will appear in the attic before it reaches the ceiling, making the source easier to pinpoint than visible ceiling stains suggest.
What is a roof saddle and when is it required?
A roof saddle (also called a cricket) is a peaked metal structure built on the upslope side of a chimney to deflect water and debris around it. Most building codes require a saddle when the chimney is wider than 30 inches measured perpendicular to the roof slope. Without one, water pools behind the chimney and accelerates both flashing and masonry deterioration.